Parging
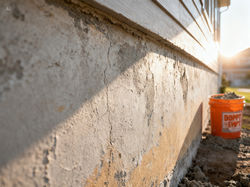
Parging is a masonry finishing technique that involves applying a thin layer of cement-based mortar to foundation or masonry walls to create a smooth, uniform surface. It is commonly used on exterior foundations, basement walls, and other concrete structures to improve their appearance by covering rough or uneven areas. In addition to its cosmetic benefits, parging also provides a protective layer that helps shield surfaces from weather exposure, minor moisture penetration, and surface deterioration. While it is not a structural repair, parging is a cost-effective way to enhance the durability and overall look of your home or building.
Why Parging is Beneficial
🧱 Step 1: Improves Appearance
Parging gives your foundation a smooth, clean finish by covering rough, uneven concrete. It instantly enhances your home’s curb appeal and creates a more polished look.
💧 Step 2: Adds Surface Protection
The parging layer acts as a protective coating that helps shield your foundation from rain, snow, and temperature changes, reducing surface wear over time.
❄️ Step 3: Helps Prevent Minor Damage
By sealing small imperfections and hairline cracks, parging helps limit further surface deterioration caused by moisture and freeze-thaw cycles.
💰 Step 4: Cost-Effective Maintenance
Parging is an affordable way to maintain and refresh your foundation without the need for major repairs or replacements.
🏠 Step 5: Increases Property Value
A well-maintained foundation improves the overall look and condition of your home, which can positively impact its value and appeal to buyers.
 |  |
|---|---|
 |
Parging Installation Process
🧹 Step 1: Surface Preparation
The foundation surface is carefully cleaned to remove all dirt, dust, grease, and loose or crumbling material. Any old, failing parging is chipped away to expose a solid base. Proper preparation is essential to ensure the new parging bonds effectively and lasts over time.
🔧 Step 2: Repair Minor Imperfections
Before applying the new layer, small cracks, holes, and uneven areas are filled and leveled. This step creates a stable and consistent surface, preventing future issues and helping the final finish look smooth and professional.
💧 Step 3: Apply Bonding Agent
A bonding agent is applied evenly across the surface to improve adhesion between the existing wall and the new parging material. This step helps reduce the risk of peeling, cracking, or separation, especially in changing weather conditions.
🪣 Step 4: Mix the Parging Material
A cement-based mortar mix is prepared to the proper consistency, ensuring it is neither too thick nor too runny. The right mix is crucial for easy application, strong bonding, and a durable finish that will stand up to the elements.
🧱 Step 5: Apply the Parging Coat
The mortar is applied using a trowel in a thin, even layer across the entire foundation surface. Care is taken to ensure consistent coverage and thickness, which helps create a uniform look and long-lasting protection.
✨ Step 6: Smooth and Finish
Once applied, the surface is carefully smoothed out to achieve a clean, even appearance. Depending on the desired look, a light texture or perfectly smooth finish can be created, enhancing the overall appearance of the home.
🌤️ Step 7: Curing and Drying
The parging is left to cure and harden properly, allowing it to fully bond to the foundation. During this time, it’s protected from extreme weather conditions to ensure maximum strength, durability, and a long-lasting finish.